Here are some accessibility options to help persons of different abilities use a Windows PC:
1) for persons with physical disabilities
2) for persons with low vision
3) for persons with blindness
4) for persons who are deaf or hard of hearing
Resources with more information on accessibility support for Windows can be found in Section 5.
1) For Persons with Physical Disabilities
a) Windows Speech Recognition with MouseGrid
Windows Speech Recognition
Windows Speech Recognition is a free-to-use app that allows users to control their PCs via voice command without the use of a keyboard or mouse. It is useful for persons with physical disabilities who have limited mobility in their upper limbs. Watch this video to learn how to set up and use the app.
Pre-requisites:
Tips:
Check and adjust your microphone/headset levels in ‘Manage Audio Devices’ setting
Work in a quiet environment to give clear voice commands
Work best when operated on a single monitor screen
Click here for a list of all the Windows Speech Recognition commands.
MouseGrid
MouseGrid is a feature that comes with the Windows Speech Recognition app. It allows users to move the mouse pointer to a specific area with voice commands. After MouseGrid is launched, it will display a translucent three-by-three grid on the screen, with the sections divided and numbered.
Launching and Using the MouseGrid
Zoom-in
Selecting Section
When the section of the grid has landed on a defined part of the screen that users would like to access such as a button icon, say “Click” together with one of the grid numbers to select it (e.g. “Click 8”)
Dismissing the MouseGrid
Below is an example of how MouseGrid is used alongside Zoom (video conferencing platform), to open the Zoom chat window.
When MouseGrid is activated on the screen, users can verbally command their preferred number shown on the grids on screen (for example, grid 8). A new three-by-three grid will appear in that area as shown below.
.jpg?sfvrsn=317b0e73_0)
.jpg?sfvrsn=24d0dc2f_0)
Users can repeat this process to get the grid to further define the area they wanted to click upon.
.jpg?sfvrsn=7f859e3b_0)
.jpg?sfvrsn=d85a6bed_0)
For a demonstration of how you can use voice control with MouseGrid to hold a Zoom meeting, watch this video.
The above method of using voice control with MouseGrid via Windows Speech Recognition can also be applied to other video conferencing platforms in Windows, e.g. Microsoft Teams, Skype for Business, Cisco Webex.
b) On-screen keyboard functions
Persons with limited mobility in their upper limbs can use the on-screen keyboard function, along with a wearable wireless assistive mouse pointer, such as the Quha Gyroscopic Mouse or GlassOuse, to perform on-screen typing to chat on video conferencing platforms.
To activate the on-screen keyboard function:
Alternatively, select the Windows Start menu icon on lower-left corner of screen > Settings > Ease of Access > Keyboard > Turn on Use the On-Screen Keyboard
Once activated, a virtual keyboard as shown below, will be displayed on the screen for the user to type with their hands-free mouse pointers

2) For Persons with Low Vision
a) Make Text Bigger on Display
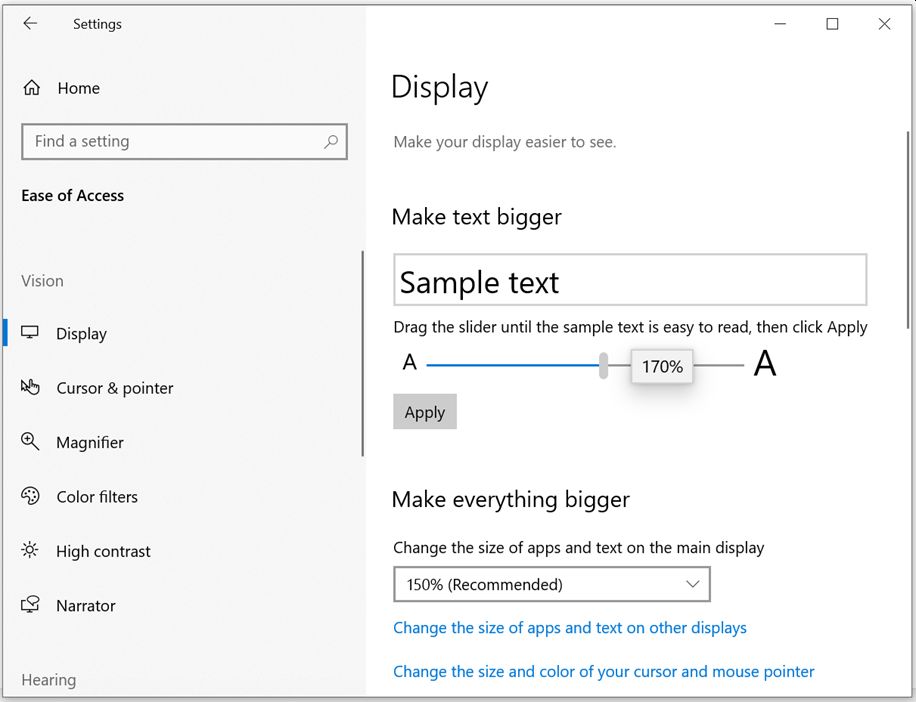
To increase the size of text, apps, and other items:
Go to Windows Start menu icon > Settings > Ease of Access > Display
Use the slider under “Make text bigger” to enlarge the text. Or, select an option from the drop-down menu under “Make everything bigger” to adjust the size of the display
b) High Contrast
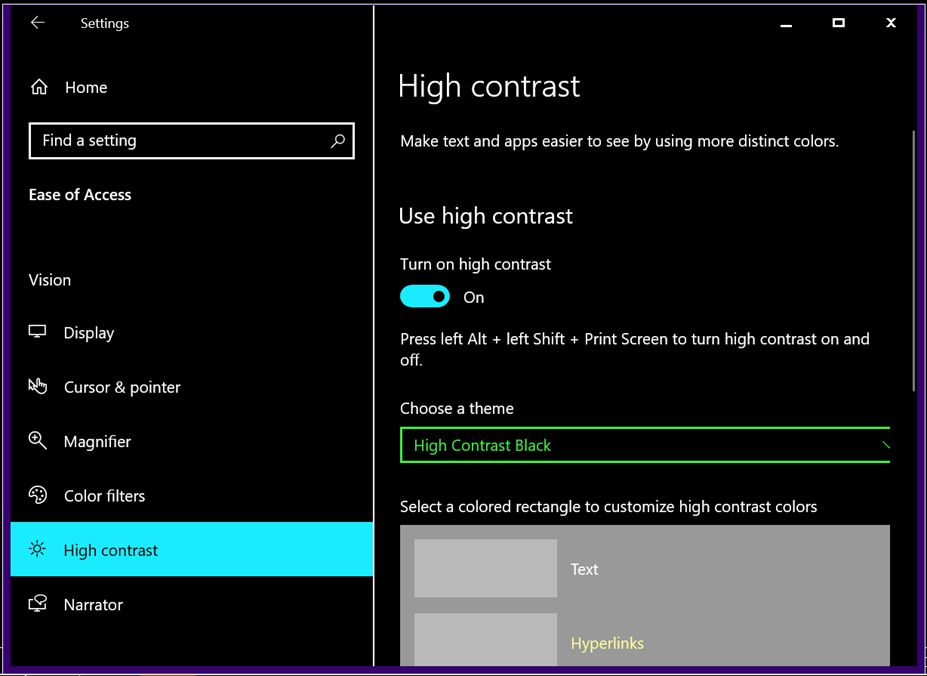
To increase the colour contrast of the display:
Go to Windows Start menu icon > Settings > Ease of Access > High contrast
Choose a high contrast theme, and switch on the toggle under Turn on high contrast
Press Alt + Shift + Print Screen to toggle the High Contrast On/Off
c) Magnifier
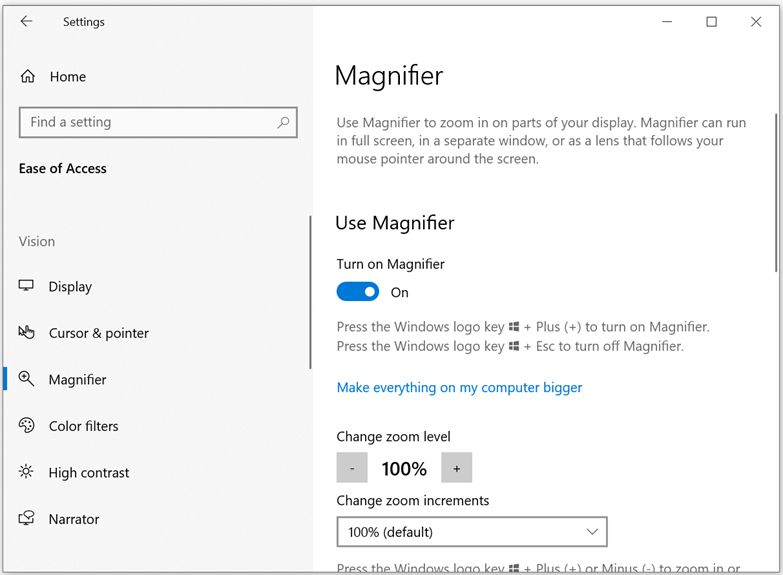
To switch on the Magnifier function:
Go to Windows Start menu icon  > Settings > Ease of Access > Magnifier (Or press Windows logo key
  + Ctrl + “M” key to open Magnifier settings), and then switch on the toggle under “Turn on Magnifier”
Alternatively, press Windows logo key  + “+/=” key and to turn on the magnifier and zoom into the screen page
Press Windows logo key + “_/-” key to zoom out of the screen page
To invert colours after turning on Magnifier:
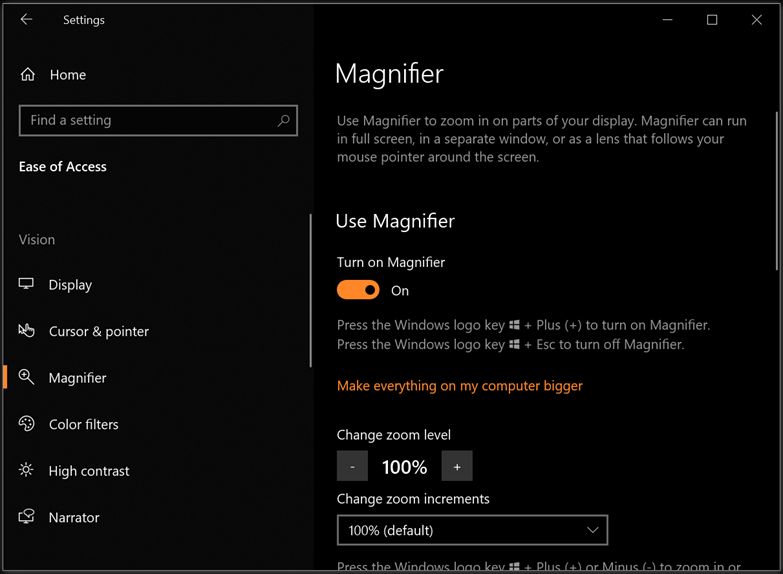
To switch off the Magnifier function:
Click here for more information on Windows Accessibility for persons with low vision. 3) For Persons with Blindness
a) Screen Reader Support
Windows Narrator
The Narrator accessibility feature in Windows enables persons with visual impairment
to complete common tasks on the computer without a mouse. It reads out and
interacts with elements on the screen such as text and buttons, and can be used to
read and write emails, browse the internet, and work with documents. The Narrator
can also be used to read out the text content on the screen of the video conferencing
platform.
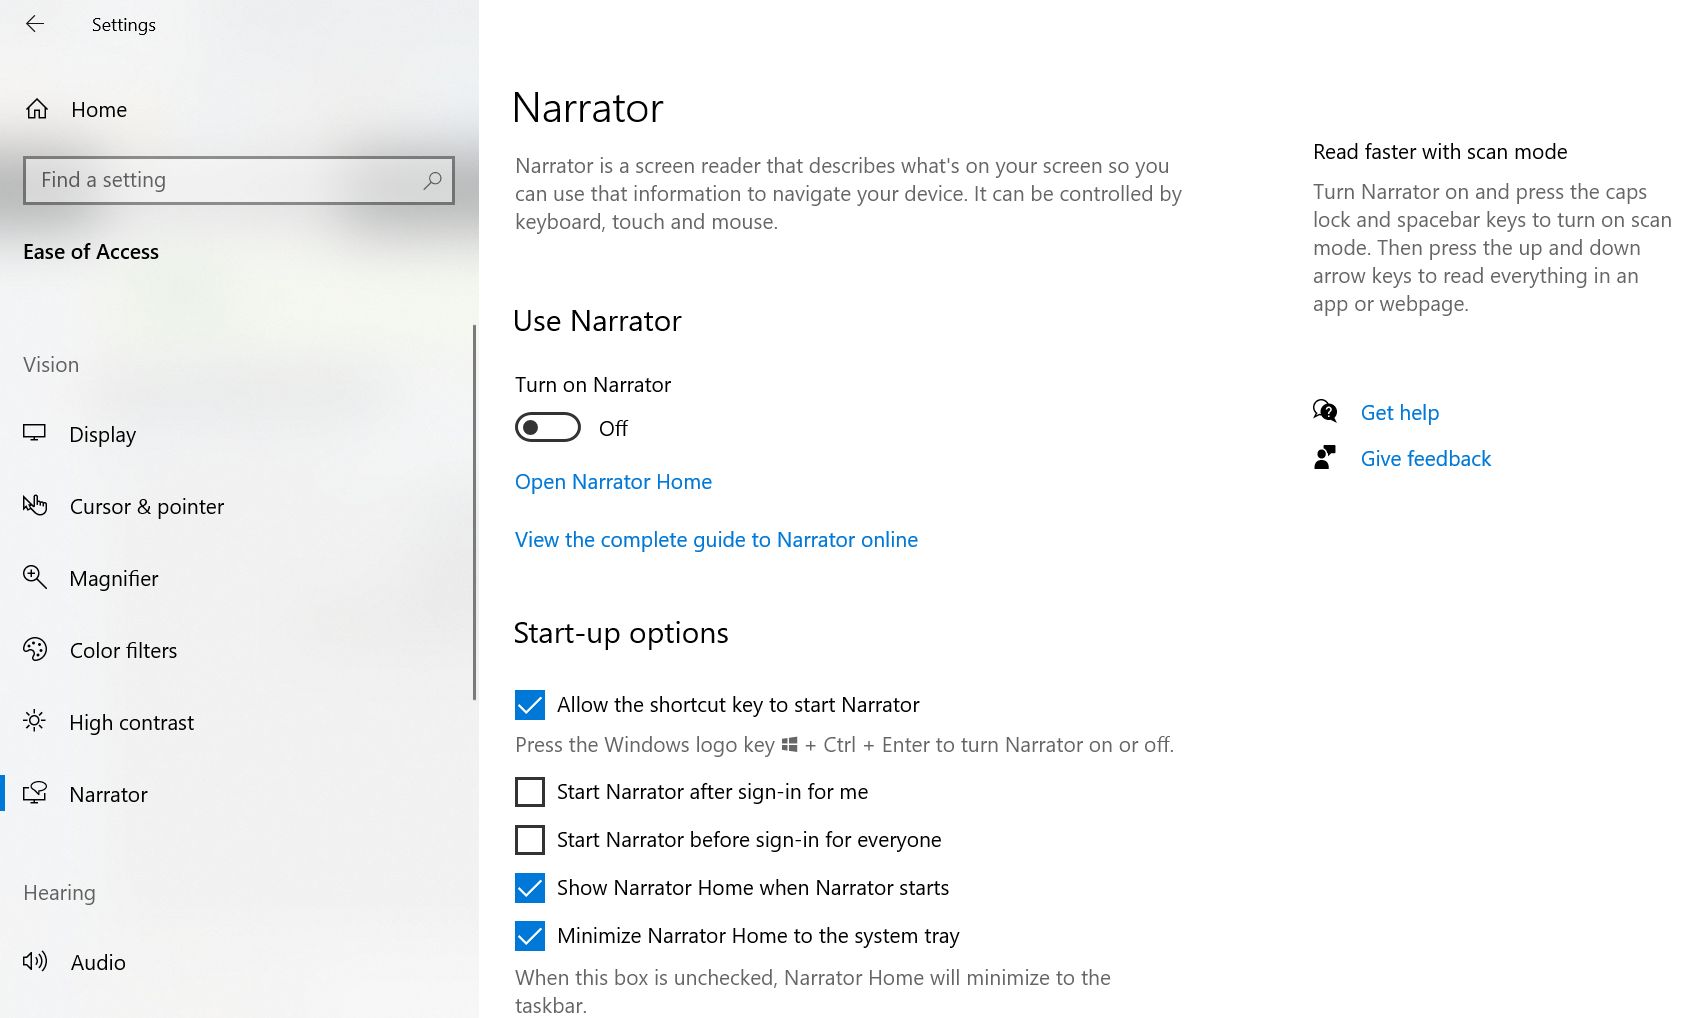
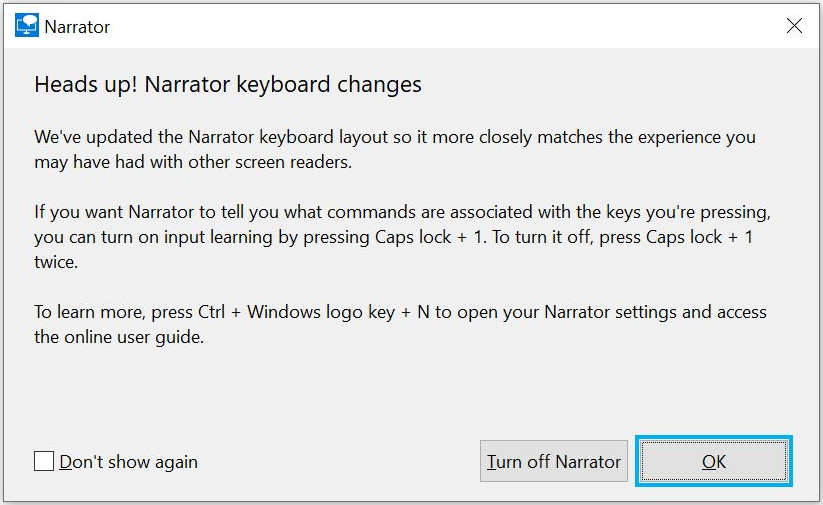
There are two ways to start and stop the Narrator function:
1) Press Windows logo key  + Ctrl + “N” key to open Narrator settings, and turn on the toggle under Use Narrator. (Alternatively, go to Windows Start menu icon
  > Settings > Ease of Access > Narrator.) Or,
2) Press Windows logo key  + Ctrl + Enter key (Toggle for start/stop)
In Windows Narrator, use the Tab or arrow keys to navigate apps and webpages. Keys such as Tab, arrow, and Enter keys can also be used to navigate check boxes and buttons.
Click here to find more information on Windows Narrator.
4) For Persons who are Deaf or Hard of Hearing
a) Closed Captions Customisation
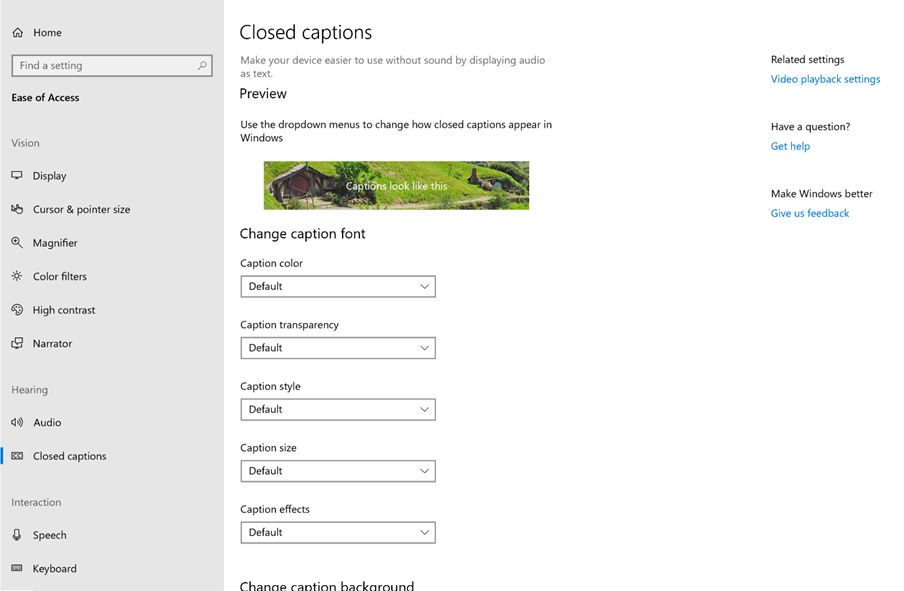
When watching a movie or TV show, closed captions can be customised in Windows apps, or in software application such as PowerPoint.
To customise closed captions:
Click here to learn more about closed captions in movies and TV for Windows 10.
b) Notification Settings
To select how visual alerts for notifications are displayed:
Press Windows logo key  + “U” key to open Ease of Access, and select “Audio”. (Alternatively, go to Windows Start menu icon
  > Settings > Ease of Access > Audio)
Go to “Show audio alerts visually” as shown below. Select an option from the drop-down menu for notifications display
Options include “Flash the title bar of the active window”, “Flash the active window”,
“Flash the entire screen”, or “No visual alert”.
.jpg?sfvrsn=2af58da3_0)
5) More Information about Accessibility Support for Windows
a) Microsoft
b) Video conferencing platforms